How to uinstall programs (WIN 7, 8, 8.1, 10 & MAC)
taken from http://windows.microsoft.com/en-ca/windows-8/uninstall-change-program & http://www.wikihow.com/Uninstall-Programs-on-Mac-Computers
For WIN 7 Users
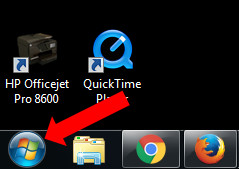
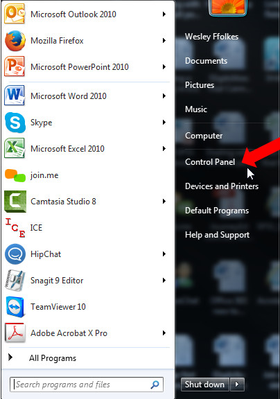
Open the Control Panel. You can access the Control Panel from the Start menu. The Start menu can be opened by clicking the Windows logo in the bottom-left corner of the display, or by pressing the Windows key on your keyboard.
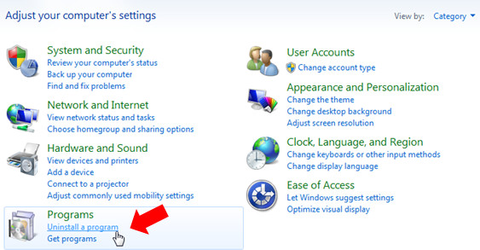
- In Category view, click the “Uninstall a program” link under the “Programs” category
- In Icon view, click the “Programs and Features” icon.
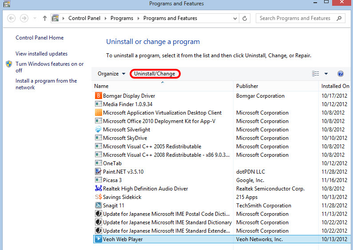
Under Programs, click uninstall a program
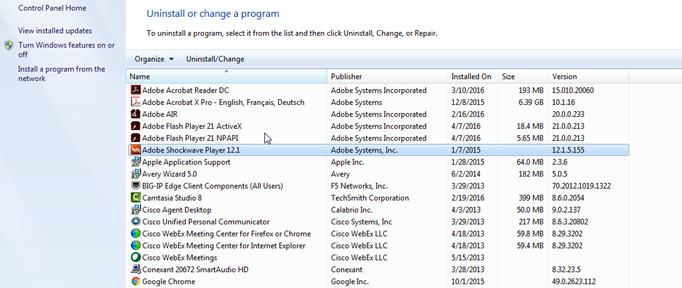
Find the program you want to uninstall . When you open Programs and Features, you will see a list of all of your installed programs. You may need to wait a few moments for the list to fully load. Click the program in the list to select it.
- If the program you want to remove does not appear on the list, check to see if it has its own uninstallation tool. This will be typically located in the Start menu group, which you can get to by clicking Start → All Programs →Program Name or Company.
- If you can’t find the uninstallation tool anywhere, it may be malware and will need special procedures to remove.
- Download a program such as Malwarebytes and scan your computer for malware.
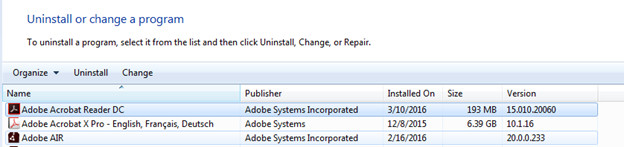
Click the Uninstall button. This will appear in the top toolbar when a program is selected in the list. You can also right-click on the program to find Uninstallation in the menu that appears. Click it to begin the uninstallation process. You will be asked if you want to continue.
For WIN 8 Users
To begin, access the Start Screen:
Windows 8: Press the Windows Key ![]() , or hover the cursor in the bottom-left corner of the screen until a small image of the Start Screen appears, then click on the icon to toggle over to the Start Screen.
, or hover the cursor in the bottom-left corner of the screen until a small image of the Start Screen appears, then click on the icon to toggle over to the Start Screen.
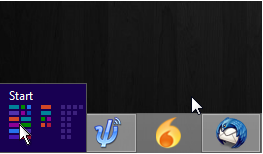
Locate the application you would like to uninstall and right click on the icon. A check-mark will appear in the right corner to indicate an application has been selected. Click Uninstall on the toolbar that appears at the bottom of the screen.
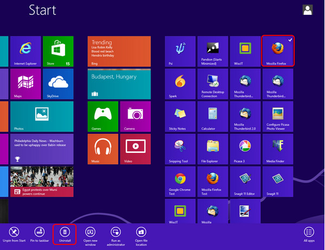
The Programs and Features window will open. Make sure the correct application is highlighted, then press Uninstall.
To Uninstall a desktop program
Swipe in from the right edge of the screen, and then tap Search.
(If you're using a mouse, point to the upper-right corner of the screen, move the mouse pointer down, and then click Search.)Enter control panel in the search box, and then tap or click Control Panel.
Under View by:, select Large Icons, and then tap or click Programs and features.
Tap or click the program, and then tap or click Uninstall.
Follow the instructions on the screen.
For WIN 8.1 Users
To Uninstall an app on the Start screen
To begin, access the Start Screen: Press the Windows Key  , or click on the Start icon in the lower left-hand corner (identical to the Windows Key icon) to open the Start Screen.
Locate the application you would like to uninstall and right click on the icon. A check-mark will appear in the right corner to indicate an application has been selected. Click Uninstall on the toolbar that appears at the bottom of the screen.
The Programs and Features window will open. Make sure the correct application is highlighted, then press Uninstall.
To Uninstall a desktop program
Swipe in from the right edge of the screen, and then tap Search.
(If you're using a mouse, point to the upper-right corner of the screen, move the mouse pointer down, and then click Search.)Enter control panel in the search box, and then tap or click Control Panel.
Under View by:, select Large Icons, and then tap or click Programs and features.
Tap or click the program, and then tap or click Uninstall.
Follow the instructions on the screen.
For WIN 10 Users
Uninstall a program
If you want to free up space on a drive, you can uninstall programs you're not using.
To Uninstall an app on the Start screen
On the Start screen, press and hold or right-click the app tile.
Tap or click Uninstall.
If you'd rather not uninstall an app, but want to remove it from your Start screen, instead of tapping or clicking Uninstall, tap or click Unpin from Start.
To Uninstall a desktop program
Swipe in from the right edge of the screen, and then tap Search.
(If you're using a mouse, point to the upper-right corner of the screen, move the mouse pointer down, and then click Search.)Enter control panel in the search box, and then tap or click Control Panel.
Under View by:, select Large Icons, and then tap or click Programs and features.
Tap or click the program, and then tap or click Uninstall.
Follow the instructions on the screen.
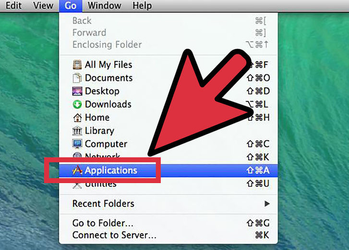
For MAC Users
PART 1
- To find out whether your account has admin rights, click on the Apple menu, select System Preferences, and then choose Users & Groups. Check that your account shows in the list as "Admin."
- Programs can possibly found in other locations, such as the Desktop.
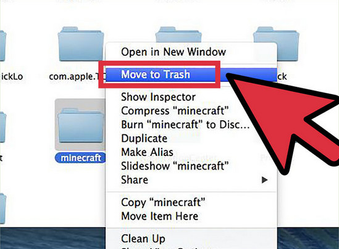
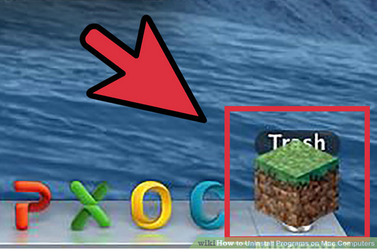
- You can quickly move selected programs to the trash by pressing Cmd + Del.
- The Trash acts as a safety buffer in case you delete anything by mistake. If you open the Trash, you can view its contents and drag items back out if required.
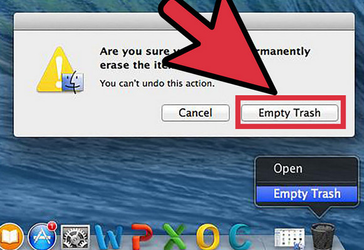
- You can quickly empty the trash by pressing Command + Shift + Del. If you don't want to be prompted for a confirmation, press Command + Shift + Option + Delete instead.
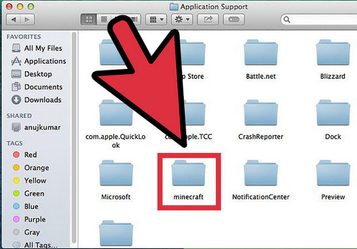
PART2 (OPTIONAL) Deleting Support and Preference Files
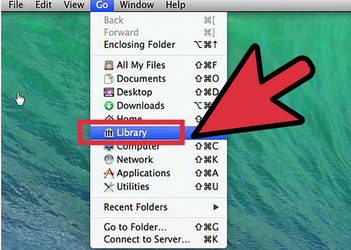
- You can open the Library folder by holding the Option key and clicking the "Go" menu. The Library option should appear in the menu.
- You can permanently unhide the Library folder by following the steps in this guide.